
Bouncing Balls Inside a Circle
Create physics simulations of bouncing balls inside a circle.
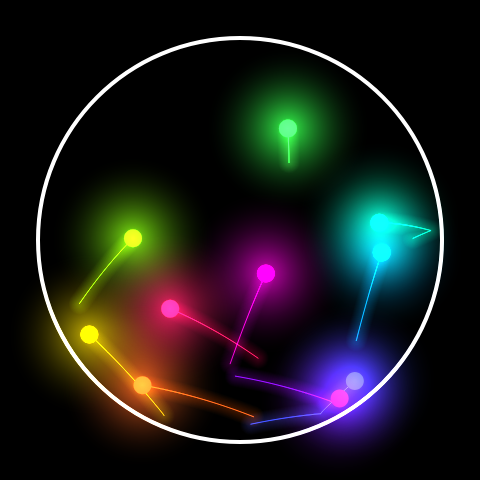
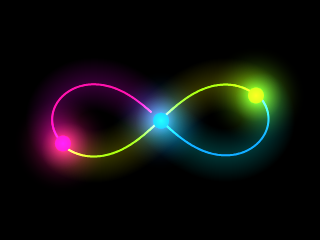
This is an online physics simulation of bouncing balls inside a circle. With this tool you can create custom simulations of bouncing balls inside a circle and generate videos.
You can customize the simulation by changing parameters like the number of balls, the radius of the balls, the radius of the circle, the gravity and more. For each ball you can set the initial position and velocity.
You can also customize the visualization, including colors of the balls, glow effects, light effects, ball trajectories and more.
During the simulation, you can change the animation speed, the circle radius, the radius of the balls, the gravity or other parameters.
To learn more about each configuration parameter, read the documentation below.
If you want, you can record and download videos of your simulations. The simulation videos will be generated using webm extension. You are free to share the generated videos on YouTube, TikTok or any other social media or website. Attribution is not required but appreciated.
Elapsed time: 0 ms
Configuration parameters
Canvas size
| Field | Description |
|---|---|
| Resolution | The canvas width and height, in pixels. You can select an option from the list of commom display resolutions, or use "custom" to choose any width and height. |
| Width | The width of the animation canvas, in pixels. |
| Height | The height of the animation canvas, in pixels. |
Initial conditions
| Field | Description |
|---|---|
| Number of balls | The number of balls for the simulation. These balls will be created inside the circle. |
You can configure the initial position and initial velocity for each ball.
| Field | Description |
|---|---|
| Position x | Initial x coordinate of the ball. |
| Position y | Initial y coordinate of the ball. |
| Speed x | Initial horizontal velocity of the ball. |
| Speed y | Initial vertical velocity of the ball. |
Circle
| Field | Description |
|---|---|
| Circle radius | The radius of the big circle, in pixels. All balls will bounce inside this circle. |
| Line thickness | The line width of the circle. |
Physics
| Field | Description |
|---|---|
| Gravity | The gravity. |
| High precision | If high precision is enabled, there will be multiple physics updates for each animation frame. This will make the simulation more precise, but may cause it to become slower also. |
| Steps | If high precision is enabled, you can configure the number of steps (physics updates) for each animation frame. More steps means more precision in simulation. |
Visualization
In this section you can configure how you want to visualize the simulation, including some nice effects.
Trajectory
| Field | Description |
|---|---|
| Show trajectory | If enabled, the simulation will show the trajectories (trails) of the balls. |
| Trajectory length | The ball trajectory length, in animation frames. You should avoid setting very large trails because it may cause the simulation to become slow. |
| Trajectory width | The width of the trajectory, in pixels. |
| Glow trajectory | If enabled, the trajectory will have a glow effect (neon). |
| Glow width | If the glow trajectory is enabled, this will set the width of the glow. |
Balls
| Field | Description |
|---|---|
| Show bals | If enabled, the simulation will render the balls. You can disable this option if you only want to see the balls trajectory, for example. |
| Ball radius | The radius of the balls. |
| Ball color generation | This option set how the color of the balls will be generated. It can be a different color for each ball or a different color for each simulation (if you enable the "chaos visualization" option). |
| Connect balls | If enabled, the balls will be connected with a line. This line don't affect the simulation physics, only the visualization. |
Lights
| Field | Description |
|---|---|
| Show lights | If enabled, the balls will have a light effect, similar to glow or neon. |
| Light intensity | The intensity of the light effect. |
| Light radius | The radius of the light effect. |
Chaos visualization
The "chaos visualization" allows you to render multiple simulations in a single animation or video. This works by making multiple independent simulations in parallel, and joining them together by combining each simulation as a layer in the resulting animation frames.
To enable the chaos visualization, just set the field "number of simulations" to a value grater than 1. You need to restart the simulation for this to take effect.
| Field | Description |
|---|---|
| Number of simulations | The number of simultaneous visualizations of the simulations. Each simulation will tipically have a small change in the initial position of one or more balls. You can configure these offsets (see table below). These changes in the initial positions cause increasing differences in the positions over time, that you can visualize in this online tool. Large number of simulations can cause the animation to become slow. However, you can record videos using this online tool, so that the generated videos will keep the configured framerate. The generated videos will always have the configured framerate, even if the recording process takes too long. |
If you enable chaos visualization (by setting the number of simulations to a value greater than 1), you can configure the fields "offset x" and "offset y" for each ball. All balls must have offset x or offset y different than zero, otherwise you will not be able to see the differences in the trajectories.
| Field | Description |
|---|---|
| Offset x | The change in the horizontal position of the ball, for each simulation. For example, if the "position x" is set to 100 and the "offset x" is set to 1, the initial x coordinate of the balls will be 100, 101, 102, 103 and so on. |
| Offset y | The change in the vertical position of the ball, for each simulation. For example, if the "position y" is set to 100 and the "offset y" is set to 1, the initial y coordinate of the balls will be 100, 101, 102, 103 and so on. |
Coordinates
| Field | Description |
|---|---|
| Origin | The coordinates origin (0,0). Can be "top left" or "center". |
| Offset x | The "x" coordinate offset, in pixels. It determines the horizontal position of the "camera". Adjusting this offset lets you shift the view or "move" the camera. |
| Offset y | The "y" coordinate offset, in pixels. It determines the vertical position of the "camera". Adjusting this offset lets you shift the view or "move" the camera. |
Zoom
| Field | Description |
|---|---|
| Zoom | Changing this parameter allows you to "zoom in" or "zoom out". |
Background
| Field | Description |
|---|---|
| Transparent background | If this option is checked, the animation will have transparent background. |
| Background color | The background color, in hexadecimal value. For example, use #000000 for a black background. |
Audio
| Field | Description |
|---|---|
| Play sound on ball collision | If enabled, a sound will be played when a ball collides with the circle. |
| Volume based on collision speed | If enabled, when the collision occurs, the sound volume will be louder when the ball is moving faster. |
| Volume | The audio volume, in decibels. |
| Max polyphony | The maximum number of sounds that can be played simultaneously. |
| Frequency | The audio frequency, in hertz (Hz). |
| Duration | The audio duration, in seconds. |
| Velocity | Velocity is how forcefully a note is played. It affects the volume. It ranges from 0 (silent) to 1 (maximum volume). |
Animation speed
| Field | Description |
|---|---|
| Animation speed | The speed of the animation. Values greater than 1 means the animation will play in "fast motion". |
Animation control
| Field | Description |
|---|---|
| Start | Start the simulation. |
| Restart | Restart the simulation. |
| Pause | Pause the simulation. |
| Resume | Resume the simulation. |
| Stop | Stop the simulation. |
During the simulations, you can download the current animation frame at any time.
| Field | Description |
|---|---|
| Download current animation frame | Download current animation frame (in PNG format). |
Generate and download video
Instead of only watching the simulations online, you can also record and download videos of your simulations. The simulation videos will be generated using webm extension.
You are free to share the generated videos on YouTube, TikTok or any other social media or website. Attribution is not required but appreciated.
| Field | Description |
|---|---|
| Framerate | The amount of frames per second that you want the video to have. |
| Automatically stop after... | If enabled, the video recording will stop automatically after the configured time (in seconds) or after the configured amount of frames. |
Related tools